Quick Fix: How to replace and repair MacBook keys
Share
Do you know that frustrating feeling when your MacBook keys are worn out, stuck or even broken?
Don't panic, we'll help you. Learn how to repair your keys yourself and discover our products to get your MacBook working again. We ensure that you can use your MacBook properly again.
Below you will find detailed instructions for the repair. Although it is not a mandatory requirement, we still recommend reading it carefully or watching the corresponding video, as even small errors can lead to an unsuccessful repair attempt.
DIRECTIONS
If you don't yet have suitable hinges or buttons to replace, you can order them via our website. To do this, you should consider the following things:
-
Find out your MacBook's model number . You can easily find this on the back of your MacBook.
-
Choose a layout , but be careful because each language has its own layout, so it is important to choose the right one as they might be slightly different.
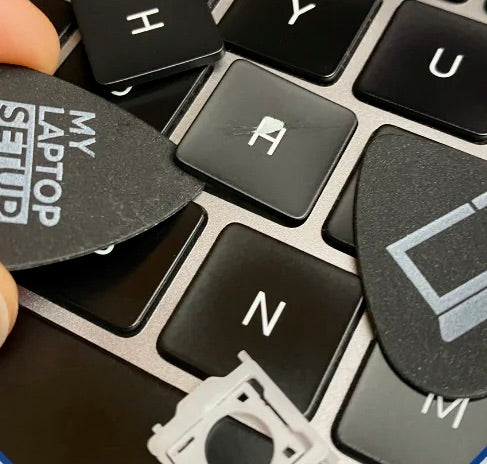
It is also important that you use the right repair tools . If you order your buttons and/or hinges on our site, you will receive a repair tool. Otherwise, you can also use a knife or a small flathead screwdriver.
CAUTION : You can create a short circuit or damage your MacBook if you accidentally scratch it. So make sure that you turn off your MacBook and disconnect it from the power before repairing.
It's also important to know that if you decide to replace your button, that doesn't mean you have to replace the hinge too. You can check whether this is defective by pressing this. If it is difficult or impossible to press down, it is defective and should also be replaced.
In the following we will show you examples of what repairs look like for the various keys. To illustrate this, we also have a video that you are welcome to watch.
Example repair using the "Option key" (this is repaired in the same way as all other keys that have the same shape, e.g.: A, B, C, etc.):
-
First you should lever out the left or right front corner, e.g. B. with the included repair tool.
-
You now look at the hinge. If this can be pressed down easily, it is functional and does not need to be replaced. If it doesn't move, you should also remove and replace the hinge.
If your hinge is functional or you do not want to replace your hinge, you can skip steps 3 and 4.
-
When it comes to the hinge, you have to make sure to remove the hinge pin from the hooks. Once you've done this, the hinge will usually pop out on its own.
-
When inserting the hinge, make sure that the smooth side faces upwards. Then push the hinge pins on the left and right of the hinge under the hooks until they click into place.
-
When it comes to the button, you have to look on the back to see where the slider is and which side the hinge pins are on. First you push the button up (away from you), then down until it clicks into place.
Now follows instructions for repairing the left “Command” key. The repair is the same as for the left "Shift" key and the right "Command" key:
If your hinge is functional or you don't want to replace your hinge, you can follow steps 2 and 3.
-
First you loosen the clips on the bottom right or left.
-
Then push the hinge pins from the hinge over the hooks (away from you)
-
Then put your new hinge back in, making sure that the smooth side is facing up. Then you pull the hinge slightly towards you and press it in.
-
On the back of the button you can see how you should attach the button.
-
You push the slider in first and then press the button down.
Please take a look at our homepage if you are interested in our products.
If you have any questions, you can click on the “Help/Contact” column on our homepage and you will be redirected immediately.
https://mylaptopsetup.freshdesk.com/support/tickets/new
(Link to homepage: https://my-laptop-setup.com/ )
(Link to Help/Contact: https://my-laptop-setup.com/a/faq)
We hope that we were able to help you and that you can use your MacBook efficiently again. ;)
